
Making a Cloud Book: A Cloud & Wind Study
By freshlyplanted - 7:00 AM

One of the joys and struggles of school is that it happens everyday (smile). While children benefit from this rhythm, it can be hard to decide what to include day to day. We aspire for simplicity:
Small, easy to implement, tasks to build on everyday.
Calendar and weather studies have always been a natural part of that rhythm:
- What's the date today?
- How do we write it, and the month too?
- How many more days until this, or how many days have passed since that?
Studying clouds helps us predict weather, and this cloud book was so fun to make together! We also use our weather vane (at the end of post) to keep an eye on our crazy changing weather. Our local saying is, "Don't mind the weather- just blink & it'll change!"
Easy DIY Cloud Book For Kids
*This post includes affiliate links. Clicking on a link gives us some pennies and helps keep the coffee pot filled at no cost to you. Thank you! (full disclosure)
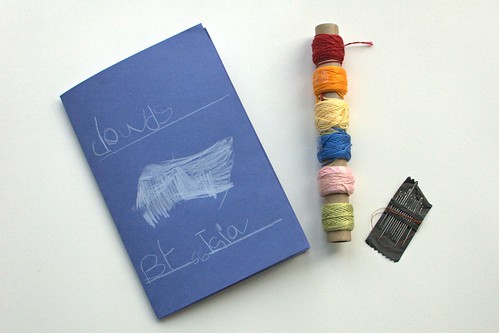
MATERIALS
- Two pieces of construction paper
- Cotton Balls
- Glue
- Colored Pencils
- String, Yarn or Embroidery Thread
- Yarn Needle/ Embroidery Needle
DIRECTIONS
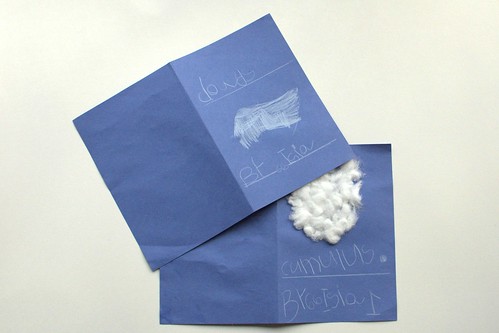
Step One: Fold both of construction papers in half widthwise (or "hamburger" as we used to say in middle school). Place one inside of the other, then mark your pages. We began with the first inner page as 1, the next facing page as 2, then the back page as 3 since we're studying three types of clouds: cumulus, stratus, and cirrus.
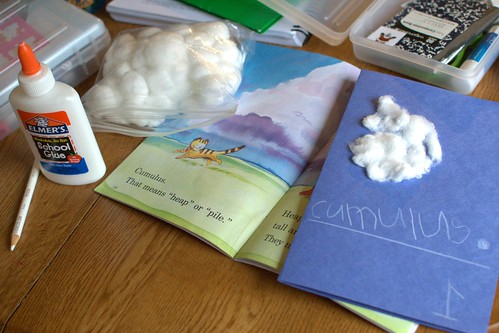
Step Two: Design and decorate your cover, then start create your cloud pages. Here Isia has decided to begin with a cumulus cloud while referencing "Clouds" by Marion Bauer. It's a favorite on our nature shelf! Keep adding clouds until you've filled your pages. You might need to let the pages dry in-between cloud pictures, depending on how much glue was used.
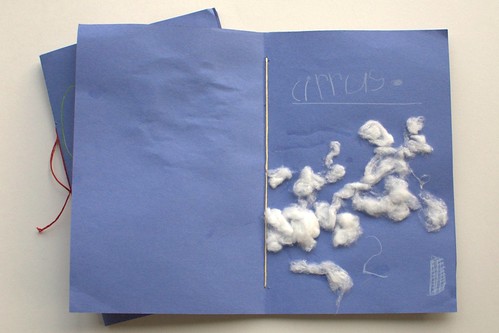
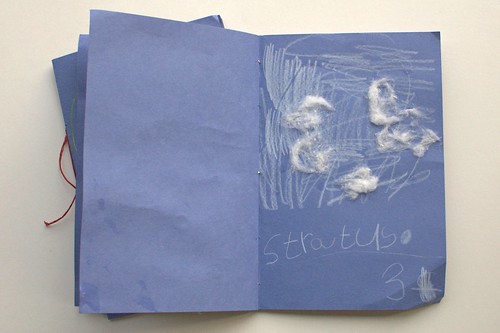
Here is what her finished pages looked like:
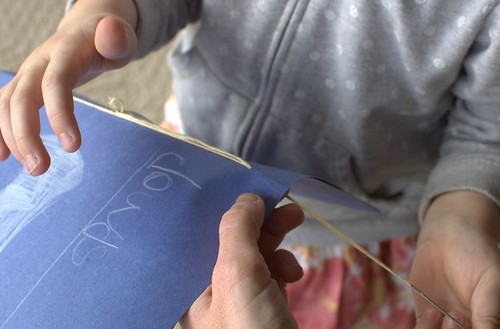
Now for assembling! You're going to take a long length (I usually measure it from their hand to shoulder) of embroidery thread (or yarn/ string), and thread your needle. Then stack your pages together, making sure they're lined up (double-checking to make sure) and as even as possible.
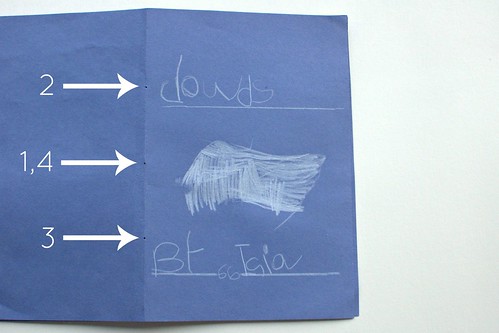
Now sew your book together with four stitches. (Sidenote: Once you've mastered this binding, you can turn any stack of papers into a quick book. It's pretty amazing.) I like to mark my holes first by laying my entire book flat on a piece of cardboard, and pushing a pushpin through the middle for my #1, 4 hole. I then make my #2,#3 holes by roughly dividing the space on either side of my middle hole in half.
SEWING
SEWING
- Take your needle and go in the #1 (middle) hole from the outside, leaving a long tail hanging out as you sew (you can see a bit in the picture below), then sew on the inside to the #2 hole.
- Pull your needle through the #2 hole, then sew up the length of the outside to the #3 hole.
- Pull your needle through the #3 hole (as pictured below)
- Sew back up to middle on the inside, and pull through. Pull your string taunt, without bending the book. Knot string ends together and tie a bow, clipping off any excess.
Your easy cloud book is finished! These make great references, especially on a nature shelf. You can mark daily cloud formations on the calendar and mark the wind too- which is nice to study with clouds (especially since it's so good at pushing them along).
A quick weather vane is a great way to figure where it's coming from- and where it's going.
A quick weather vane is a great way to figure where it's coming from- and where it's going.
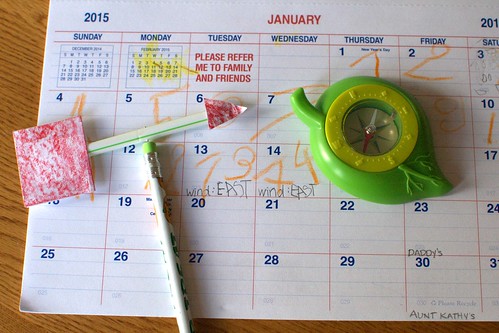
Simple Straw & Pencil Weather Vane
MATERIALS
- Half of a Straw
- Square cut out of cardstock for the wind catch
- Smaller* triangle cut out of cardstock for the arrowheard
- Straight-pin
- Pencil with good eraser
- Compass
DIRECTIONS
Tape your triangle to the front of the straw, then tape your square to the bottom end of the same side. Stick your straight-pin through the middle of the straw, right into your pencil, leaving room for your weather-vane to rotate around. Blow gently on it to make sure it rotates freely, making adjustments as needed.
*The smaller arrowhead allows your weather vane to point toward the source of the wind. Since the arrow is smaller, the surface area toward the back of the arrow is lighter. So when your weather-vane catches the breeze, it turns to distribute the air flow evenly on both sides of the arrow.
To use: Take your weather-vane outside and hold gently up in a windy area. Watch to see here the your arrow points, then compare to your compass to see which direction the wind is coming from. For fun, keep a daily calendar of wind directions and look for patterns- especially during seasonal changes.


0 comments
Note: Only a member of this blog may post a comment.